In this tutorial, we will integrate CKEditor5 with a Django project. In addition to the default plugins, we will outline steps to bundle other third-party plugins by integrating an open-source Mathjax plugin. Finally, we will set up a default config profile to load various toolbars in the rich-text editor and look at how we can create rules about the HTML elements the author can create. Let us get started!
Since security updates for the open-source version of CKEditor 4 were discontinued, we also wanted to migrate away from it for Pirate Learner. The author of django-ckeditor also hung up his boots on the integration app (check the deprecation notice) owing to the license change to GPL and probably licensing issues down the line. CKEditor 5 was an option for its familiarity. Luckily, there is a wonderful integration app available as django-ckeditor-5, which has a similar integration pattern as the ckeditor4 integration. We will be using the django-ckeditor-5 app for this post.
CKEditor5 has been a major rewrite of CKEditor4. Consequently, the way plugins are bundled or installed has changed. While we could drop a plugin into the plugins folder inside a CKEditor installation, plugins for CKEditor5 are distributed and installed through npm packages. We must repackage django-ckeditor-5 after building CKEditor5 with the required plugins locally.
Enabling Mathjax plugin in Ckeditor5
We will use the open-source mathjax plugin from Sauli Anto for rendering mathematical and chemical equations.
Clone the django-ckeditor-5 repository locally and install the dependencies. Care must be taken that the version for Ckeditor packages and for the math package match. This can be done by editing the
package.jsonfile.npm install npm install --save @isaul32/ckeditor5-mathIn the file app.js, add the following to include the maths package plugin in the CKEdito5 build:
import Math from '@isaul32/ckeditor5-math/src/math';
import AutoformatMath from '@isaul32/ckeditor5-math/src/autoformatmath';
Include the Math plugin and AutoformatMath plugins to the list of built-in plugins:
ClassicEditor.builtinPlugins = [...
        Math,
        AutoformatMath
        ];
Build the bundle
npm run prod- Commit the changes to the repository. In our case, we also needed to bundle the newly created dist/bundle.js file. For a locally hosted test deployment, we will use this repo to install and use the package in our Django project.
Installing and enabling Ckeditor5 in Django
Now that we have bundled the Mathjax plugin, it is time to install the updated packages in our Django project.
Install django-ckeditor-5 from the locally hosted repo instead of the vanilla package inside the virtual environment as:
pip install git+file:///path/to/your/packageNow, enable the app in the Django project's
settings.pyfile:INSTALLED_APPS = ( ... 'django_ckeditor_5', ... )Update the URLs in the project's
urls.pyto enable loading the CKEditor resources:urlpatterns += [ path("ckeditor5/",include('django_ckeditor_5.urls'), name="ck_editor_5_upload_file"), ]We use the blogging app for writing our content. A model
CharFieldnamedbodycontains the content of the article. django-ckeditor-5 introduces a model fieldCKEditor5Fieldjust like django-ckeditor had aRichTextFieldfield. We want to avoid binding our data models in Django with a third-party app where we can avoid it. This has paid off for now while migrating from CKEditor4 to the CKEditor5 app. Instead, we would alter the rendering of the form instead of altering the model fields to integrate the CKEditor instance. We would use the CKEditor5 form widget for the fields we need to enable rich text editing. For the required field in the forms class:body = forms.CharField(widget = CKEditor5Widget(config_name='author', attrs={"class": "django_ckeditor_5", 'row': 20,'cols': 25}), required=False)Here, we specify that editing the field must be done using the author profile for the CKEditor instance. If nothing is passed, 'default' is used. The toolbars for all profiles must be defined at the time of initializing the CKEditor5 instance. The settings to configure the toolbar will be shown in the next step. The widget is imported as:
from django_ckeditor_5.widgets import CKEditor5WidgetWe are almost done with the Python part. At last, we need to configure the toolbar elements of the CKEditor to control what tools are visible to the authors when writing content. For this, we add a `
CKEDITOR_5_CONFIGS` dictionary in oursettings.pyfile as follows:CKEDITOR_5_CONFIGS = { 'author': { "toolbar": ["sourceEditing", "|", "bold", "italic", "underline", "strikethrough", 'subscript', 'superscript', "|", "alignment", "horizontalLine", "|", "bulletedList", "numberedList", "outdent", "indent", "|", "insertTable", "imageInsert", "link", "blockQuote", "code", "codeBlock", "math", "|", "undo", "redo", "heading"], "math": { "engine": 'mathjax', "outputType": 'span', "forceOutputType": False, "enablePreview": True, "className": 'math-tex' }, "codeBlock": { "languages": [ #Do not render the CSS class for the plain text code blocks. { "language": 'plaintext', "label": 'Plain text', "class": 'language-plaintext' }, { "language": 'javascript', "label": 'JavaScript', "class": 'language-js javascript js-code' }, { "language": 'python', "label": 'Python', "class": 'language-python'}, { "language": 'css', "label": 'CSS' , "class": 'language-css' }, { "language": 'html', "label": 'HTML' , "class": 'language-html' }, { "language": 'C', "label": 'C' , "class": 'language-c' }, { "language": 'bash', "label": 'Bash' } ] } } }In these settings, we have enabled a few toolbar options, such as the basic text formatting, codeblocks, image uploads, and maths symbols. The settings for the maths plugins are contained in the nested dictionary with the key
math. Finally, the supported languages which must be highlighted (wrapped around with the appropriate class name) are specified in thecodeBlocksettings. Further rules to allow or disallow certain HTML tags, attributes on the tags, classes, or a combination of the above three can be set up using the HTML support plugin, which is already bundled.We must render the Maths symbols on the editor and reading pages. For this, the templates for the pages need to be updated.
We will use the Mathjax CDN scripts to render the Latex symbols. The steps are pretty simple. We instantiate a Mathjax object, pass the data that needs rendering through the object, and display the output. For the first part, we need to instantiate the Mathjax object by including the following in our templates where rendering is required. This includes both the CKEditor form/edit page and the reading page.
<script type="text/javascript" src="https://cdnjs.cloudflare.com/ajax/libs/mathjax/2.7.6/MathJax.js?config=TeX-MML-AM_CHTML"></script>
        <script>MathJax.Ajax.config.path["mhchem"] = "https://cdnjs.cloudflare.com/ajax/libs/mathjax-mhchem/3.3.2";
        MathJax.Hub.Config({                                                    showMathMenu: false,
        TeX: {                                                      extensions: [ "[mhchem]/mhchem.js" ]                                              },
        messageStyle: "none",
        tex2jax: {                                                      preview: "none"                                          }});
        </script>
The second step is not required on the form edit page as those scripts are invoked through the CKEditor instance. For the reading page, the following code takes the data wrapped inside the div with the class name set to 'article-body' and passes it through the Mathjax object.
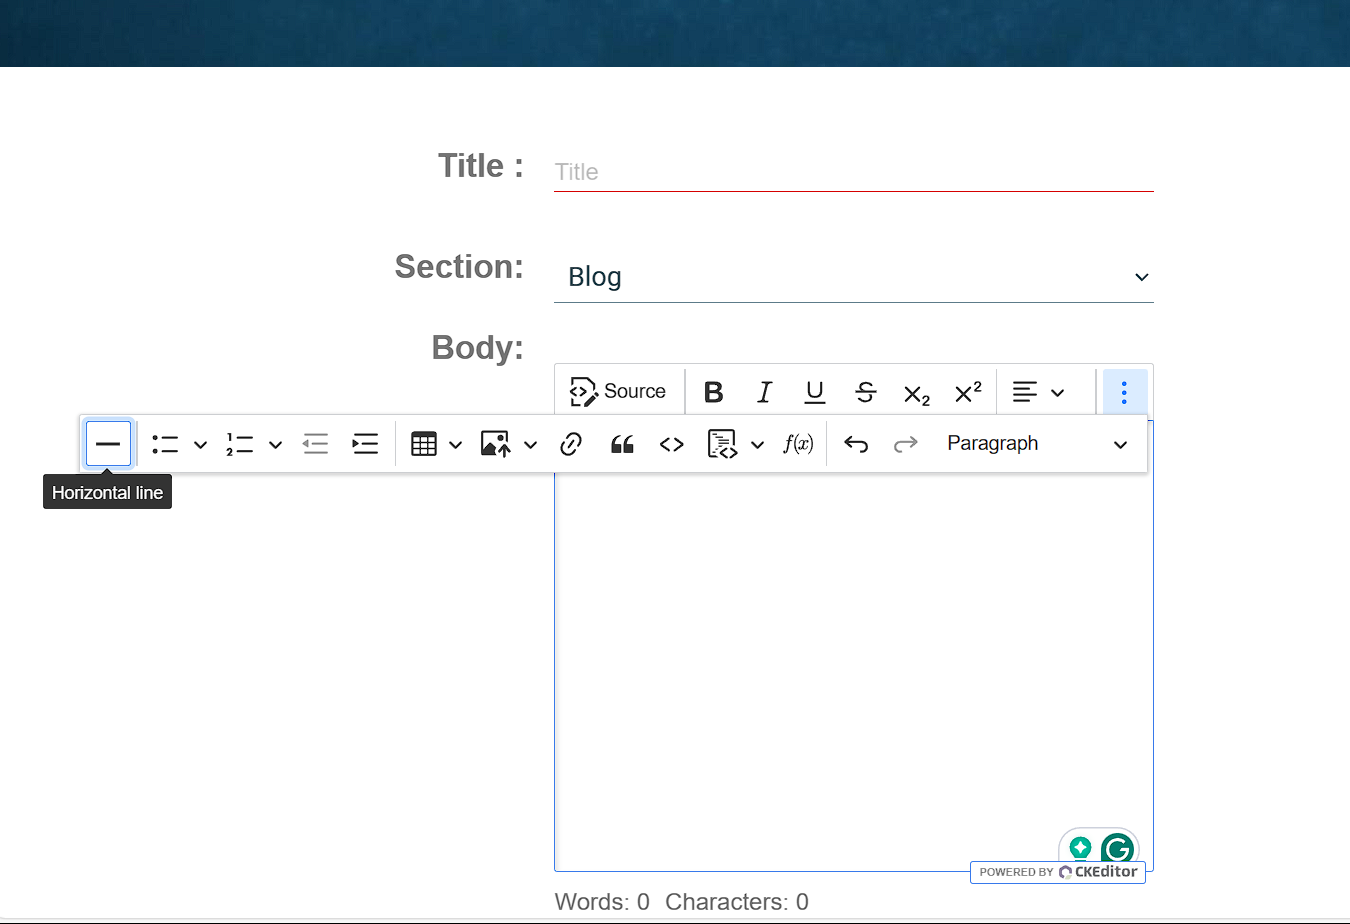
<script> const preview = document.getElementsByClassName('article-body')[0]; MathJax.Hub.Queue(["Typeset", MathJax.Hub, preview]); // MathJax 2 </script>- We are done with the CKEditor 5 integration. Fire up the Django project server instance and check the integration. With the current settings, it would look something like the image below.
Since we enabled the codeblock plugin in our toolbar, we will also include Highlight.js related scripts for the enabled programming languages to highlight the code in our template as follows:
<link rel="stylesheet" href="https://cdnjs.cloudflare.com/ajax/libs/highlight.js/11.9.0/styles/default.min.css">
<script src="https://cdnjs.cloudflare.com/ajax/libs/highlight.js/11.9.0/highlight.min.js"></script>
<script src="https://cdnjs.cloudflare.com/ajax/libs/highlight.js/11.9.0/languages/c.min.js"></script>
<script src="https://cdnjs.cloudflare.com/ajax/libs/highlight.js/11.9.0/languages/python.min.js"></script>
<script src="https://cdnjs.cloudflare.com/ajax/libs/highlight.js/11.9.0/languages/html.min.js"></script>
<script src="https://cdnjs.cloudflare.com/ajax/libs/highlight.js/11.9.0/languages/shell.min.js"></script>
<script>hljs.highlightAll() </script>
The script above loads up the core highlight js, its CSS, and the languages we want highlighted. Finally, we invoke the function to highlight the code. Additional languages can be added by referring to the list of languages at the Highlight.js repository page.
So, there it is, folks! In this article, we covered the integration of CKEditor5 into a Django project, integrating maths symbol support for it, and configuring the rules for HTML content that can be entered through the CKEditor5 instance. As a bonus, we integrated Highlight.js code syntax highlighting as well. If you need help following these steps, let us know in the comments.